Thursday, August 11, 2011

Recommendation: Got an old iPhone 3G? Put Whited00r on it!

Also applicable to the iPhone 2G, and the iPod Touch 1G and 2G

Apple's iPhone 3G is now over three years old, and they have discontinued support for it. The latest software version to be released for it (ver 4.0+) includes lots of great features, but makes the device unusably slow. For this reason, many people are reverting their iPhone 3G's to iOS ver. 3. The disadvantage with this is that you loose all the great features from iOS 4. You can gain some of these back by jailbreaking, but that once again slows down the device greatly.

The solution? Whited00r!


Whited00r is a custom software version (firmware) that is based on the version 3.0 software. It is customized to include a huge amount of features, allowing it to be on par feature-wise with iOS 4, but still run as fast as iOS 3. In addition it is customized to have the appearance of iOS 4, and even includes features that 4 doesn't have.

Whited00r is very easy to install, and is completely free. I recently discovered it while looking into making my old 3G usable again, and I've been fairly amazed by it. It really feels like a breath of fresh air compared to how my device used to be.

So, if you've got an old 3G that you want to put to use again, put Whited00r on it!

Here's a basic list of the features:

  • Multitasking (iOS 4 style)
  • Folders (iOS 4 style)
  • Homescreen Wallpaper (iOS 4 style)
  • Jailbroken with Cydia for additional apps (installing these will slow down device)
  • Battery Percentage
  • MMS (Multi-Media Messaging)
  • Tethering via Bluetooth and USB
  • Tap-to-Focus (Camera)
  • Emoji Icons
  • Search in Page (Safari)
  • Flash Enabler (works for certain video sites in Safari)
  • Configurator (greatly speeds up device by removing unnecessary background software, and frees up additional space by removing unnecessary files)
  • Pre-Unlocked!
  • Fully Customized Firmware Greatly Speeds up Device!
To install Whited00r, go to www.whited00r.com and select your device from the "firmware download" dropdown menu at the top.

Whited00r is also available for the iPhone 2G, and the iPod Touch 1G and 2G.

Friday, August 5, 2011

How To: Add a Quick & Dirty Aux Input to Your Dodge Grand Caravan (Factory Stereo)

This is a quick and dirty way to add an aux input to your 2002 or later model Dodge Grand Caravan (with a factory stereo). This really is a quick and dirty method, that leaves you with not much control over the input, but is nevertheless effective, and can be done in under 20 minutes, for cheap or even completely free!


However,
If you can, I highly recommend you use one of these methods to add an aux input to your stereo instead:


http://www.youtube.com/watch?v=294TFX3b5-A
(requires a CD changer, but is an elegant solution)


OR
buy a PIE CHRY02-AUX, which usually runs for about $42-$70, and is a much more elegant way to do this (and doesn't require a CD changer):


(If you choose to use the CHRY02-AUX, I recommend still following the Youtube video above for instructions on how to mount an audio jack into your dash. Just run the wires from the audio jack to the RCA inputs on the CHRY02 instead.)


..both of which will give you higher audio quality, let you turn the volume louder, and let you use your stereo's normal controls for your speakers.

However I'm assuming you're here either because you don't have a cd changer, don't want to buy one, or don't want to spend the money to buy a special adapter for your stereo. Well you're in the right place! This can be done for the cost of a simple 3.5mm audio cable (a few bucks), or completely free if you've already got one laying around.
--------------------

Before we get started, let's quickly go over the pros and cons of this method:
PROS:
-cheap, can be done for a few bucks or even for free
-easy, can be done either using soldering or splicing, whichever you've got the skills and tools for
-quick, can be done in under 20 min
-effective, works immediately and doesn't require much work to complete

CONS:
-stereo is completely bypassed, so control over volume, fading, etc is not available (all other inputs - CD, Radio, etc - will still work normally)
-can only output to front speakers or rear speakers, or both with the downside that fading controls won't be functional any more for other inputs
-volume can only be controlled at the source (output is decently loud from my iPhone, but you'll be dissapointed if you like to listen *really* loud
-sound quality is pretty good (waay better than an FM transmitter or a cassette adapter), but starts to degrade at higher volume levels

Read them? Good! Don't care and ready to start? Alright! Let's go...


Step 1 - Remove Stereo

  • Pull out the cup-holder. Remove the small plastic trim piece located directly above cupholder (just pull it).
  • Remove the two screws located under the trim piece that hold the main stereo panel in place (some vehicles may have two screws that need to be removed from the top of the main panel as well).
  • Remove the entire main stereo panel starting at the bottom by pulling until the clips release (some force is required).
  • Remove the four screws holding the stereo unit in place.
  • Remove all connecting cables from the back of the stereo, and remove the stereo itself.


What exactly are we doing here?
We are going to be tapping into the speaker outputs on the back of the stereo, either by soldering on to the corresponding pins on the stereo's main board, or by splicing into the corresponding wires in the car-side harness.


METHOD ONE - SOLDERING (if you plan to splice into the stereo connector in the dash instead, skip to method two)
Note: Soldering is a cleaner method than splicing, but requires you to open the stereo unit. Both methods take about the same amount of time in the end.

Click on any image to enlarge it.

Step 2 - Open Stereo


  • Remove the two screws holding top metal plate in place (the part with the sticker on it).

  • Remove the top metal plate (tip: pry from the back with a small standard screwdriver).

  • Remove the four washer/screws (two on each side) that hold the front plastic faceplate in place.

  • Remove the volume control knob (just pull).
  • Remove the front faceplate by releasing the six clips with a small screwdriver (two clips each on top and bottom, and one on each side). Tip: do the two top and bottom clips on one side, then that side clip, then repeat on the other side.


  • Remove the front faceplate carefully.
  • Remove the four side screws holding the right side heat-sink on. (Note: these images were taken after I completed this, so just ignore the wire for now.)

  • Remove the two top screws holding the right side heat-sink on.

  • Remove the right-side heat sink.


Step 3 - Solder Aux Input Wire

  • Get your 3.5mm audio cable, and cut one end off (if it is a 3.5mm to RCA cable, remove the RCA end).
  • Strip the insulation off the resulting wires, and twist the exposed wires (not to each other).
  • Use a multi-meter to check continuity to find out which wire is which:

There are three parts to the 3.5mm plug: the tip, the ring (the middle conductor), and the sleeve (the conductor at the base of the plug). The tip is Left Signal (or Left +), the ring is Right Signal (or Right +), and the sleeve is Ground (GND, Left and Right -). Test each of these with your exposed wires to find out which wire is which. Ideally you should use a two part cable (with two joined insulation pieces), which will leave you with two ground wires.


  • Using the pinout diagram on the top plate, or the image below, solder each of the four wires to their respective pins (Tip: add a little fresh solder to each of the pins on the board first, so that they solder easier). Use the pinout diagram or the image below to solder to either the front or back speakers (your choice), or both. Remember that if you choose to solder to both, you will loose fading (front to back) control for all your other inputs (CD, Radio, etc).
Note: the pins you are going to solder onto are located on the back right of the unit (as you face it from the back), under the heat-sink you just removed, and on the adjacent corner to the actual connectors on the back of the unit. The pins you are soldering onto are the other ends of the actual pins you see in the connector, at the location where they solder into the main circuit board. 

The column of pins you see on the left in the image below corresponds to the column of pins you'd see on the right as you look at the connector from the back of the unit; the column of pins on the right below corresponds to the column on the left as you look at the connector from the back of the unit (See the pinout diagram in Method Two below to help clarify).


Remember to route your cable through a slot in the heat-sink panel!


  • Follow the preceding instructions backwards to close the unit up, and install it back into your dash.
  • Run the cable down the fin of the heat-sink that it comes out in, so that it doesn't stick out on the side (and interfere with the stereo going back in). (Note: this image shows the cable running up, when it really should be running down).


METHOD TWO - SPLICING (this method is not as clean as soldering, and a bit more difficult to pull off (and easier to mess up), as you have to modify the wire harness while it's inside your dash. However it may be easier for those of you who have never soldered before (or shy away from the thought of opening up the stereo)).

Step Two - Splice Into the Car Stereo Harness

  • Using the pinout diagram on the sticker on top of the stereo, figure out which wires in the harness go to the right front signal (RF+), the right front ground (RF-), the left front signal (LF+), the left front ground (LF-), and so on for the right and left rear speakers. Below is the pinout diagram from my stereo (yours may be different).

  • Get your 3.5mm audio cable, and cut one end off (if it is a 3.5mm to RCA cable, remove the RCA end).
  • Strip the insulation off the resulting wires, and twist the exposed wires (not to each other).
  • Use a multi-meter to check continuity to find out which wire is which:


There are three parts to the 3.5mm plug: the tip, the ring (the middle conductor), and the sleeve (the conductor at the base of the plug). The tip is Left Signal (or Left +), the ring is Right Signal (or Right +), and the sleeve is Ground (GND). Test each of these with your exposed wires to find out which wire is which. Ideally you should use a two part cable (with two joined insulation pieces), which will leave you with two ground wires.


  • Using some cheap wire splices from Radioshack (these, or these have worked best for me), splice each of the wires from your aux cable into the respective harness wires for the front, or rear speakers (or both).

Remember that if you choose to splice to both, you will loose fading (front to back) control for all your other inputs (CD, Radio, etc).


FINISHING:

  • Route your audio cable under the dash (if it's long enough), through a hole you've made in the front stereo panel (if you want to do that), or under the front panel in the bottom where it screws in (what I did - it's quick and dirty, remember?).


You could always run the audio to a jack mounted in the dash, which would be nicer, but if you're going to spend the time and money on that, just go ahead and get a CHRY02-Aux and do it properly.

PLAYBACK:
Turn your stereo OFF, plug your iPod in, and press play! Control the volume using your iPod's volume control. Beware that this will work even with the car off and the keys out of the ignition, so watch out for leaving music on and running out your battery!


ANY QUESTIONS? Leave them in the comments, and I'll get back to you as soon as I can!
--------------------

I love hearing from you. If this was helpful to you in any way, please leave a quick comment letting me know!

Disclaimer: I make no claims as to whether following any of the above will work for you. I take NO responsibility for any damage it causes to you, your car, your car stereo, or any other resulting damage or injury from following these instructions.

Saturday, June 11, 2011

Review: Player's Choice Video Games - Old Game Console Trade-In

Player's Choice Video Games is an online and brick & mortar video game store. Their physical store is located in Clemmons NC, while their online store can be found at www.playerschoicevideogames.com.


While recently searching for the best trade-in value for some old console hardware and games, I came across Player's Choice. They offered much better trade-in values than just about any other place online, particularly for my old console (original Xbox). This is a review of their service and pricing.
--------------------

I'll base this review on four different factors: Products Covered, Value, Service (communication), and Speed. Each will be compared with other companies offering the same service (Gamestop, Amazon.com, Ebay, Bestbuy, Target etc.)

If you don't want to spend the time reading about each part, just skip to the conclusion, as it will tell you all you need to know about using this service.

First I'll describe how their service works:
1. You find the items you want to trade in on their site, and add them to your "trade-in" cart. Any items not on their site can be added by emailing the webmaster first.
2. You decide how you want your trade-in to be reimbursed. Unlike other sites, Player's Choice offers two options: cash, or in-store credit. If you choose the in-store credit, you'll get a significantly larger amount for your stuff.
3. You ship your stuff to their address. Unlike other places, you have to cover shipping to them. You'll want to keep this in mind as large, heavy old game consoles can cost a lot to ship. I was still making more than from any other service even with the shipping, so I just went with it, but be sure to do the math so you're not losing money.
4. Wait for them to process the order. This took almost 3 weeks for me, so if you're in a rush, you don't want to use this service.
5. Get either a check in the mail, or a gift certificate code by email, and go buy something with your new cash!


1. Products Covered:
Player's Choice, unlike just about any other place out there, will add anything not already on their site for you. That means that just about any video game hardware or games you have will be worth at least a few bucks for trade-in. This was one of the main reasons I decided to try them, as most other services would only take a few of the items I had. If you have to have products added, be ready to wait a while, since the webmaster only seems to check his email every few days.
2. Value:
Player's Choice offers a better value, in cash or store credit, than just about any other place out there. I originally sold all my items on eBay for $49. After the seller was unsatisfied and made me pay her to return everything, I went to Player's Choice. They gave me just under $80 trade-in credit for everything. I would have gotten about $56 if I had chosen cash too. I could have made about $20 on Target or Amazon.com (because they only accepted a few items), and even less at GameStop.
3. Service (communication):
Despite all the great plusses in value and products accepted, this is where they fell behind. It seems that the only person running all web business is the webmaster, and the only way to contact him is by email. This would be fine if he responded more often than once a week. Any attempts to call the actual store results in being referred back to the webmaster again. On average I think I waited four days for responses from the webmaster, and several times only got responses after sending several emails demanding information. You will of course find much better service from just about any other company out there.
4. Speed:
Tied into the issues with their service is their speed of service. If you are in any rush, don't use this service, as you will find yourself waiting for a long time for any service. I think I waited at least three weeks before getting a confirmation of my order being processed. That's three weeks from when they received it. During this time I found myself trying several times to contact the webmaster about the status of my order, and only receiving vague replies after several days. Most other companies, particularly Amazon.com will offer much faster service than this.

Player's Choice Video Games offers a great value for your old consoles and games, and an even better value considering they will take many things that other stores won't. Unless you have absolutely no need for any gaming gear, I recommend getting your money as store credit, as you'll get a lot more for your stuff this way.
Unfortunately, their service and speed does not sit anywhere on par with their value or range of items. If you are an impatient person, or want to get your money right away, do not use this service. You will find yourself frustrated and disappointed. On the other hand, if you just have some old console gear or games laying around, and figure you'd like to make some money off them, go ahead and send your stuff in, then forget about it. A few weeks later you'll get your cash (without having stressed out about it), and you can go get yourself a new game or something!
Don't forget to make sure it's worth it after the shipping cost.
--------------------

I love hearing from you. If this was helpful to you in any way, please leave a quick comment letting me know!

Saturday, June 4, 2011

Recipe: Taco-Bell Crunchwrap Supreme

Probably one of the most amazing, useful, and delicious innovations to come from the fast food industry to date is Taco-Bell's Crunchwrap Supreme. It combines the convenience of a sandwich, the crunchiness of a taco, and the flavorful awesomeness of a burrito. On top of that, it actually manages to be more portable, more convenient, and less messy than a burrito itself (the undoubtable king of portable foods).

For those of you who have never had a crunchwrap yourselves, here is a description straight from Taco-Bell's website:
"A warm, soft, flour tortilla filled with seasoned beef (or beans), warm nacho cheese sauce, a crunchy tostada shell, reduced fat sour cream, lettuce and tomatoes and then wrapped up and grilled for maximum portability."


It really is so innovative that it doesn't deserve to be relegated to being simply a branded food - I believe it should be as common, and often-made as the burrito itself (and maybe even someday replace it). 
So to achieve this, I now present you with, complete and tested for tastiness, the (un)official crunchwrap supreme recipe:

--------------------

Part of the trick to getting this (and other Taco-Bell foods) just right is to cook it exactly how they dofor a very short time on a very high-heat, lightly oiled grill. Induction cookers are perfect for this, as they replicate the high power and efficiency of commercial grills, and cook very evenly. 


The instructions specified here should work fine with any 10 power setting, 1800 watt induction cooker (I used a Max Burton 6000). Normal heat settings are specified as well, in case you're using a normal stove. Be aware that cook times might be significantly longer on a normal stove.

Note: being a non meat-eater myself, I made this recipe based on the vegetarian version of the crunchwrap, which uses beans instead of beef. If you want to make a normal style crunchwrap, simply substitute the beans for beef in this recipe. I also chose to use real cheddar instead of nacho cheese, as I'm not exactly partial to the processed cheeses myself.

Makes: 2 crunchwraps

What You'll Need:
  • 2 - 12 inch or larger flour tortillas
  • 2 - pre-made 5" (standard) tostada shells
  • 3/4 cup refried beans
  • 1/2 cup finely shredded cheddar
  • 1/2 cup finely chopped romaine (thin strips)
  • 1/4 cup diced tomatoes (1/4" pieces, use a firm tomato and drain any juice)
  • 1/4 cup sour cream (normal or reduced fat)


Instructions:

Set-up & Tips:
  • Your tortilla needs to be about two inches more than twice the diameter of your tostada shell. For example, for a 5 inch (normal) tostada shell, you should use a 12 inch tortilla. As all I had were 8 inch tortillas when I made these, I cut my tostada shells down to 3 inches using a sharp knife. As a result, I had sort-of "mini crunchwraps", so don't judge the size of your crunchwrap based on my pictures.
  • As the cheese needs to go nearest to the outside, and beans don't spread well on cheese, it works best to spread the beans on the tostada shell rather than the tortilla. Pre-heating the beans will also make them easier to spread, and help to melt the cheese (just zap them in the microwave quickly).
  • If you plan to use beef, invert the instructions below, and sprinkle the cheese then the meat onto the center of the tortilla first instead.
  • If you really want to do everything properly, add 1/2 Tbsp water to your sour cream, and put it into a condiment squeeze bottle for easy application.
  • WARM the tortilla for about 15 seconds in the microwave right before using it, so that it doesn't crack when you fold it.

Assembly:

     1. Spread a little over 1/4 cup of beans on your tostada shell, so that you get an even layer to the edges, just under 1/2" thick.


     2. Sprinkle about 1/4 cup of cheese over the beans, again to the very edges of the shell.


     3. Place a warmed flour tortilla centered over the tostada shell, and reaching under and supporting the shell, invert the whole assembly.


     4. Squeeze or spread a thin layer of sour cream over the exposed tostada shell.


     5. Spread about 1/4 cup lettuce over the sour cream.
     6. Spread 1/8 cup tomatoes over the lettuce.


Folding:

Now comes the tricky part. This may be a little difficult at first, but follow the instructions and pictures, and you'll get the hang of it pretty quickly.

     1. Fold one side of the tortilla as far as it will go over the other ingredients.


     2. Using your fingers, make the next fold just like the last, while tucking the extra tortilla under the fold.


3. Continue folding like this until you reach the very end, where there is a single triangular flap left.


     4. Fold this final flap closed.


Cooking:

     1. Using a folded piece of paper towel, lightly grease a 12 inch skillet (cast iron works great).
     2. Preheat skillet to power level 5 (medium high on a normal stove), until oil begins to bead.
     3. Turn to power level 3 (high side of medium), and place folded crunchwrap right-side up in pan.


     4. Using a smaller skillet (or other heavy food-safe object), press crunchwrap firmly into the pan. Turn as soon as it becomes evenly brown (about 30 sec).


     5. Use smaller skillet again to press other side into pan until nicely brown (again about 30 sec). You might want to quickly re-oil the pan before doing this.

     6. Remove, let cool, and enjoy!


--------------------

For another great induction cooked Taco-Bell imitation recipe, go here.

For more info on induction cooking, and a recommendation for a specific unit that's best as an intro to this new method of cooking, check out my post here.


I love hearing from you. If this was helpful to you in any way, please leave a quick comment letting me know!

Disclaimer: I don't own or have any relation to Taco-Bell, or any of it's brands or trademarks. Any names, trademarks, or designs used here are only used as testaments to the quality and innovation of the originals. Any images displayed here are the property of their respective owners. If you are the owner of an image used and would like it removed, please contact the author of this post.

Saturday, May 28, 2011

Recipe: Taco-Bell Style Quesadillas

This is a recipe for cooking Taco-Bell style cheese quesadillas, specifically including cooking instructions for using induction cooking.

Part of the trick here is the sauce, and part of it is in how you cook it. I myself used my new induction cooker, which is perfect for this sort of thing as it can cook things very quickly and evenly, which is what we're trying to emulate here. It should work fine on a normal stove too though.


The sauce recipe is an amalgamation of a few recipes from across the web, some guessing based on the ingredients list at Taco-Bell's website, and my own assumptions and variations. It turned out really good!


I know there are several recipes on the web for this already. I decided to post my own variation because the other recipes are for chicken quesadillas, and being vegetarian myself I wanted a recipe for the cheese quesadillas; because the other recipes online use American cheese, and I'm not exactly partial to the processed cheeses myself; and because I felt I could add something by changing a few ingredients, and specifying more clearly the exact cooking procedure needed to get the same crisp, evenly cooked outside, which is a large part of making a quesadilla similar to Taco-Bell's.


--------------------

The instructions specified here should work fine with any 10 power setting, 1800 watt induction cooker (I used a Max Burton 6000). Normal heat settings are specified as well, in case you're using a normal stove. Be aware that cook times might be significantly longer on a normal stove.

Makes: 2 half quesadillas (with leftover sauce)

What You'll Need:

Sauce:
  • 1/4 cup ranch dip OR mayonnaise (either will work fine, and you can even use 1/8 cup of each)         ---vegenaise also works fine
  • 2 tsp chopped pickled chilies or jalapenos
  • 2 tsp pickled chili or jalapeno juice
  • 3/4 tsp sugar
  • 1/2 tsp garlic powder
  • 1/2 tsp paprika
  • 1/4 tsp cayenne pepper
  • 1/4 tsp cumin
  • Optional: 1/4 tsp chipotle powder
  • Salt to taste
Quesadillas: 
  • 2 wheat tortillas
  • 1/4 cup shredded monterey jack cheese
  • 1/4 cup shredded cheddar cheese
  • 1/4 cup finely shredded fresh parmesan, asiago, or romano cheese (I can't vouch for how good the canned powdery stuff will taste)
  • Cooking oil (I used olive)

Instructions:

Assembly:

     1. Stir all sauce ingredients together until well mixed and smooth.
     2. Mix cheddar and monterey jack cheeses together.
     3. Spread about 1-1/2 Tbsp sauce on half of a tortilla (a good even layer).


     4. Sprinkle about 1/4 cup cheese mix on top of sauce (again, a good even layer).
     5. Sprinkle 1/8 cup parmesan, asiago, or romano cheese on top of other ingredients, and fold to close.


Cooking:

The trick for cooking these right, so that they're just crispy on the outside, and just melted on the inside, is to cook them just how Taco-Bell does it themselves: for a very short time on a very high-heat, lightly oiled grill. Induction is perfect for this, as it replicates the high power and efficiency of commercial grills, and cooks very evenly. Normal stoves should work just fine as well though.
  1. Using a folded piece of paper towel, lightly grease a 12 inch skillet (cast iron works great).
  2. Preheat skillet to power level 5 (medium high on a normal stove), until oil begins to bead.
  3. Turn to power level 3 (high side of medium), and place folded quesadilla in pan.
  4. Turn as soon as quesadilla begins to brown (about 30 sec).
  5. Once other side is brown (30 sec again), use a spatula to bring the uncooked edge of the quesadilla to the center of the pan, and hold for about 20 sec. Repeat on other three sides, so that quesadilla is evenly cooked all around.

     6. Remove, cut with a pizza cutter, sharp spatula, or knife and enjoy!


--------------------

For another great induction cooked Taco-Bell imitation recipe, go here.

For more info on induction cooking, and a recommendation for a specific unit that's best as an intro to this new method of cooking, check out my post here.


I love hearing from you. If this was helpful to you in any way, please leave a quick comment letting me know!

Sunday, May 15, 2011

Recommendation: The best introductory induction cooker (in the <$100 range)

So you want to check out induction cooking? Maybe you heard about it somewhere, and thought it sounds cool, or maybe you've known about it for a while and finally decided to check it out. If you're like me, you like to cook and you like techy stuff, and this seems like the perfect mix of both. 
Either way, since this is your first foray into it, you probably don't want to spend a lot of money until you're sure you like it.
--------------------

So, what is the best introductory induction cooker for under $100?
That's exactly what I set out to find out, and after doing a good deal of research, I've come to a conclusion. Now, you could go and spend the time and do all the same research, but let me save you the time. I'll tell you right now: it's the Max Burton 6000 (or the stainless steel housed 6200).

But, before you take my word on it, let me explain exactly why I've come to this conclusion. I have never owned an induction cooker myself. I don't have the time, nor the money to buy several different cookers and try them all out. But I have spent the time to make myself familiar with induction cooking and the various cookers available, and I've spent the time researching and reading reviews to figure out what's best.


Before I tell you why you should get this particular unit, let me briefly describe what induction cooking is:

What is Induction Cooking?
Induction cooking is a method of cooking that involves heating your cookware using magnetic fields. Unlike other cooking methods, such as gas and electricity, all of the energy is used to directly heat the pan, rather than first heating an element or creating a flame, and then transferring the heat to the pan.

Because of this, induction is immensely more efficient than other methods (84-90% of the energy goes to heating the pan, vs. 40% for gas ranges, and around 70% for electric ranges). Also you get the advantages of a much cooler kitchen, since none of the waste heat is transferred to the air and surrounding surfaces (other than whatever heat the pan itself radiates). This also means the induction cooktop itself is always cool to the touch, reducing the chance of burns, and making it much easier to clean.

Reasons to use induction cooking:
There are many reasons to try out induction cooking.

  • Accuracy - Unlike other methods of cooking with electricity, and similar to cooking with gas, induction cooking allows the cooking heat to be instantly adjusted, without the slow heat up or cool down you experience when cooking with electric ranges. Also the accuracy of cooking temperature is only limited by the design of the cooker, and is typically much more accurate than any other method of cooking.
  • Efficiency - As mentioned above, there is no wasted heat in induction, which means a more efficient method of cooking, and a cooler kitchen and stovetop.
  • Safety - With a cool cooktop, there is a much smaller chance of burning yourself. Also, no flames reduces the chances of fire, and avoids the potential health risks of cooking with gas.
  • Ubiquity - While not everyone has access to natural gas, almost all homes are equipped with an electrical outlet.
  • Cleanliness - Burning gas has byproducts that are vaporized, but eventually condense on a surface somewhere in the vicinity of the cooktop. Induction cooking eliminates such byproducts. In addition, having a cool cooktop means food can't get cooked onto the surface, and a flat smooth surface is also much easier to clean.
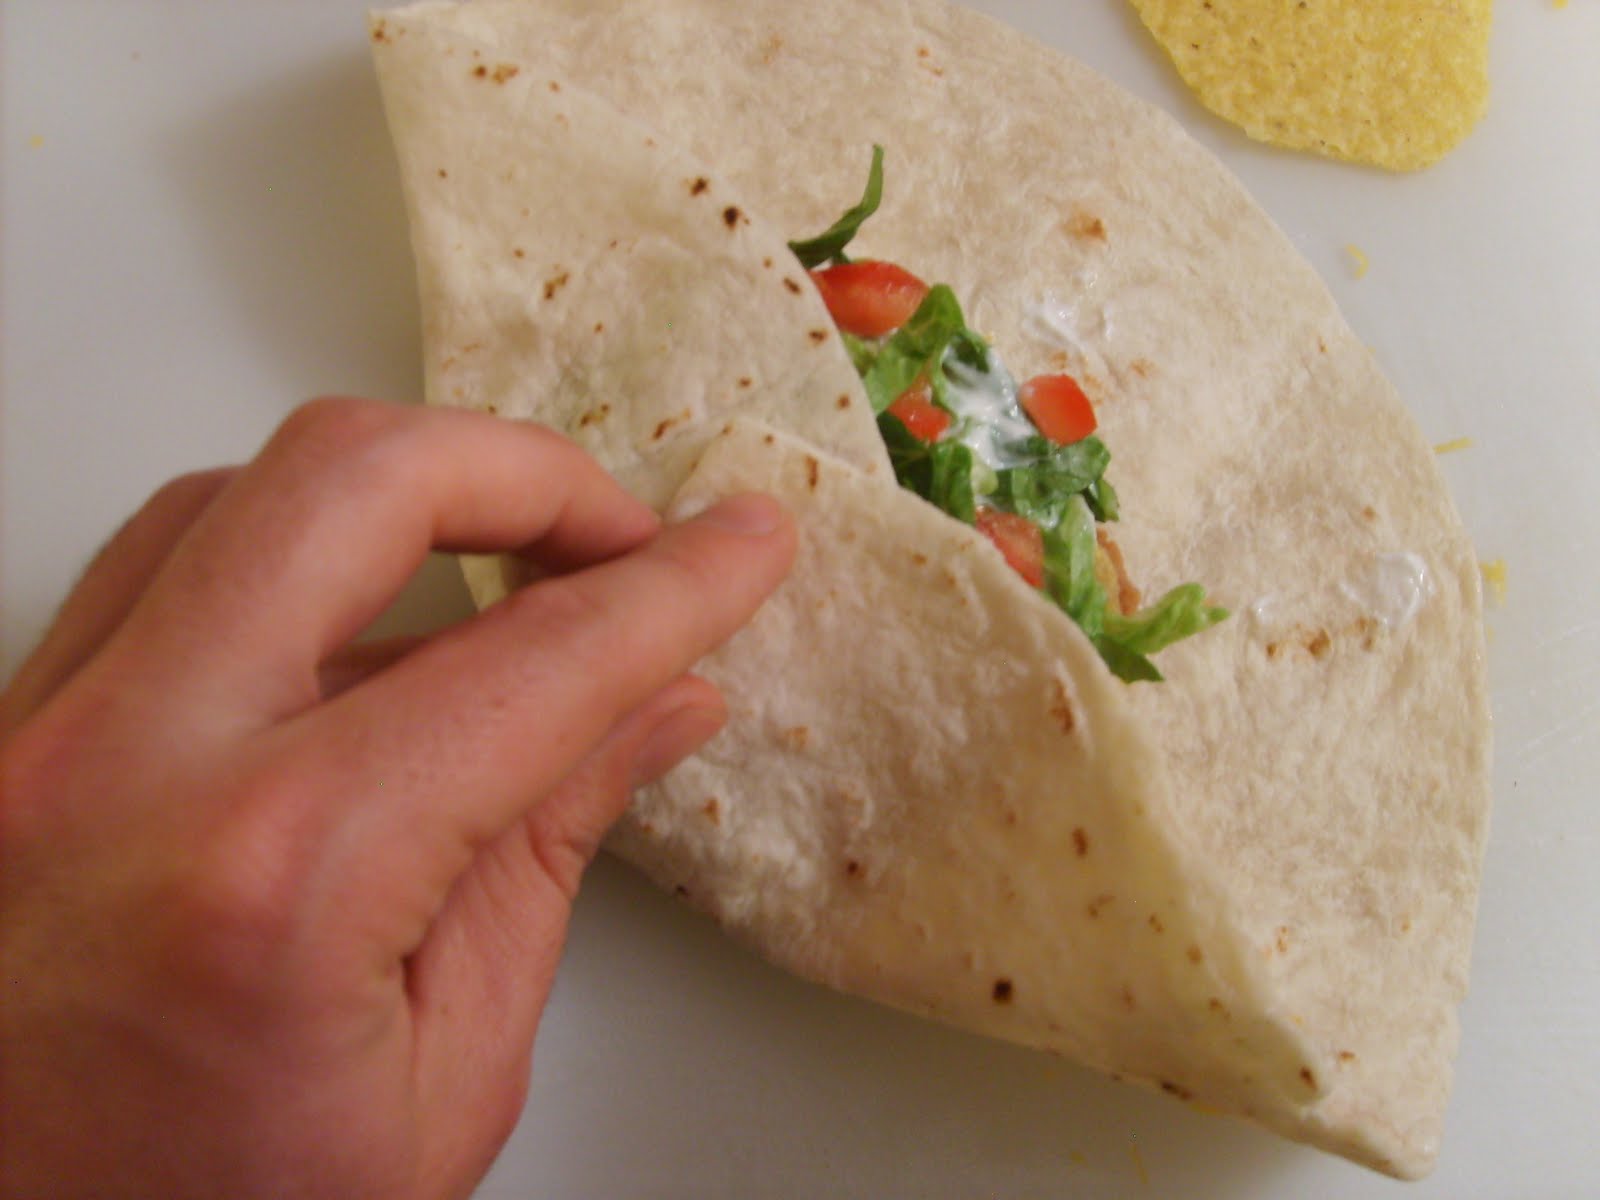
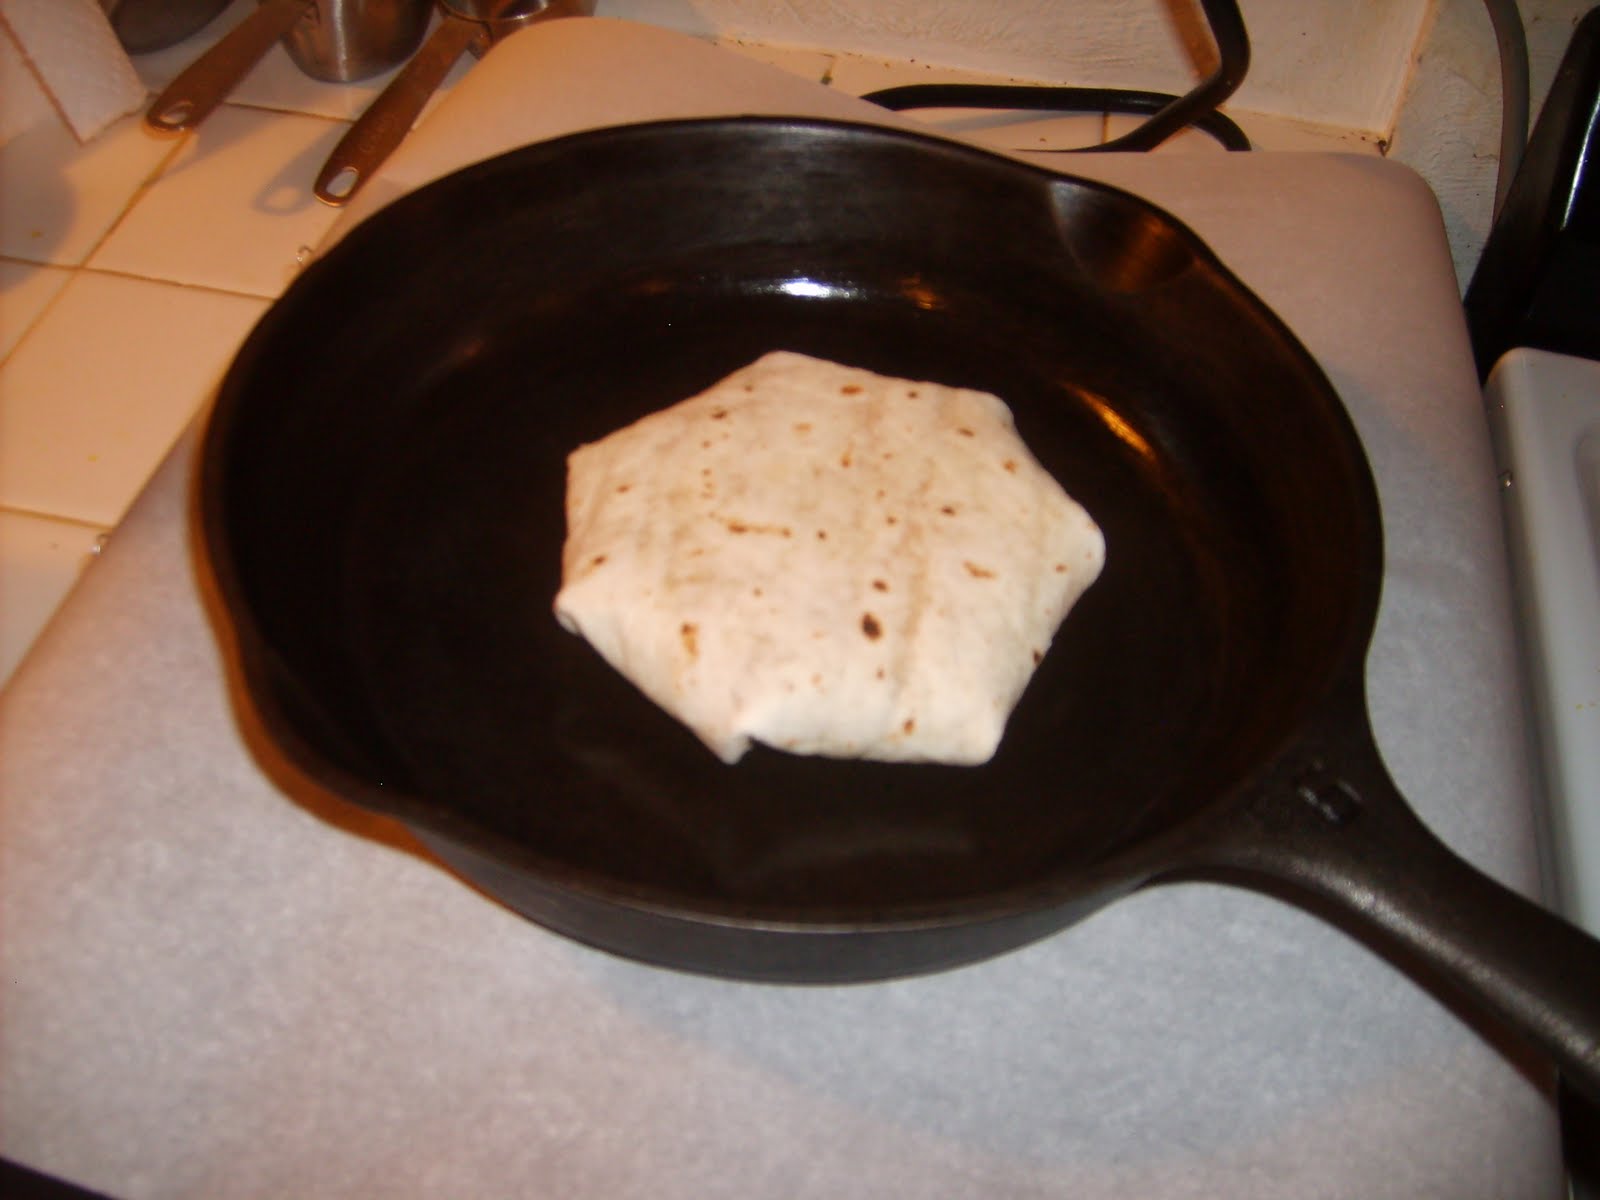
  • Speed - I have added this additional category after having some experience actually using an induction cooker. One of the biggest differences I noticed when cooking with induction is the sheer speed of it. When tested, I found that my 1800 watt Max Burton 6000 boiled water at least twice as fast as my gas stove. Everything goes a lot faster on an induction cooker. In addition, having a different heating curve actually changes how the food cooks. I noticed right away that in making a quesadilla, less cheese and oil were needed, because of the speed at which the cooker would heat it made the cheese melt much more evenly, spreading out better, and made the oil less necessary (so really it's healthier too!)
  • Evenness of Cooking - I also added this category after my experience with an induction cooker. Because of the way induction works, all parts of your cookware within the range of the element are heated perfectly evenly. This means much nicer looking, more evenly cooked food, and no need to rotate food while cooking!


Reasons not to use induction cooking:
There are, of course, always cons to any method of doing something.

  • Cookware Incompatibility - The largest negative to induction cooking is the fact that it only works with cookware that is ferromagnetic. If you already own a substantial cookware set that is made of non-magnetic materials, this can be an issue. However, if you already own magnetic cookware, this is less relevant. Luckily, some of the cheapest and nicest cookware around - cast iron cookware - is great for induction cooking! To test your cookware for compatibility, place a magnet on the bottom of the cookware and see if it sticks. If it does, you're good to go!
  • Noise - Since induction cookers have heat sensitive electronics inside them, most cookers have a cooling fan. Depending on the quality (and usually, cost) of the cooker, this fan can possibly be very noisy. Also pans with loose parts or bad cladding can rattle or buzz. Induction cooking itself, however, is a noiseless process.
  • No Flames - If you require flames to be able to char food items such as peppers, this is a drawback.
  • Electricity Failures - If your electricity goes out, you're without a cooking source (only an issue if you have completely switched to induction). While gas ranges can have the same issue, gas is much less likely to have an outage than electricity.


If you want to know more about specifically how induction cooking works, it's pros and cons, and recommended cookware, check out theinductionsite.com. It is a useful and informative (if slightly biased) resource for information on induction cooking.

Now, on to the important part:

Which cooker should I get, and why?
Put simply, the one you want is either the Max Burton 6000 or it's stainless steel housed cousin, the Max Burton 6200.

Now let's get to why:
1. Portability and size - I think we can safely assume that, for your intro to induction cooking, you don't want to spend >$1000 on a four element built in cooktop. Since you're just trying it out, it makes sense to get a single element portable unit. By choosing this, we can significantly narrow down the cookers you could get. The 6000/6200 is a single element, portable unit, so it's a perfect unit to start out on. It doesn't require any dedicated counter space, and can be put away in a cupboard after use.

2. Cost - Since you're just starting out, it doesn't make any sense to spend huge amounts of money on this. Not unless you're pretty sure you're going to go with this for your next built in cooktop, in which case you shouldn't be reading this article anyways. At this point in time, there are a good range of decent cookers available for under $100, that still have a fair amount of features and are of fairly good quality.
The 6000/6200 is actually one of the cheaper units around, at about $68 for the plastic bodied unit (6000), and $99 for the 6200 in steel. Despite this, it has all the functionality and features of units over $150.

3. Power - According to the online induction cooking resource, theinductionsite.com, there is no point in purchasing a portable unit with any less than 1.8 kW of power (1800 watts), which is the most power available in a countertop unit (the most any wall socket can deliver). This is because the cost difference between these and lesser powered units is not very large, and if you can get the highest powered unit, there is no point in going for anything less. This once again significantly narrows down the field of available units. The 6000/6200, despite is low cost, has the full 1800 watts of power, which is just another reason this is the best unit to get.

4. Design - Before deciding to purchase the Max Burton unit, I was planning to purchase a GE brand induction cooker that is only available from Walmart.com, for $59 (found here). Despite it being the cheapest unit around, it has several issues (only 1.3 kW), including the fact that part of it's design incorporates a lip around the edge of the element, effectively limiting it to only being used with pans smaller than 9" on the bottom. It also, according to reviewers, has a rather noisy cooling fan. The Max Burton has a perfectly flat cooking surface, allowing any sized cookware to be used on it. It's fan is (again according to reviewers) much quieter than other units (though it's not as quiet as what you'd get in say, a $500 unit). At only a small amount more than the GE unit, there is no reason to go with a design with such limiting features. Also, with a stainless steel bodied version available, you can get a much sleeker, more durable and easier to clean design than many other units out there.

5. Features - The Max Burton 6000/6200 has all the standard features you can expect from any unit not over $500. It has 10 temperature specific settings, between 140°F - 450°F, it can detect induction capable cookware, has an overheat and improper voltage shutoff, and a "keep-warm" setting. It also has 10 power levels between 500 and 1800 watts, and a 180 minute timer.


6. Compared to other units - For it's price and power, there are few other units that can compare to the Max Burton either in power, features, design, or any other category. In addition, while I was researching this, the Max Burton was the unit I found most recommended on various sites, and the one with the most and highest general reviews on various review and purchase sites. It was chosen by the cooking magazine Cook's Illustrated as the best of several units, including units up to $500. It was recommended by Gizmodo.com as the "best combo of power and price". I have found it generally recommended on several other sites as well.


Which unit, the 6000 or the 6200?
The Max Burton induction cooktop is made in two models:
The '6000' model, which features a plastic housing, and the '6200' model, which features a stainless steel housing. The two models are otherwise identical in features and operation.


As to whether you should buy the stainless steel housed unit or not, thats mostly a matter of how much money you would like to spend. If you are willing to spend around $100, it is definitely better to get the 6200 model, as it is sleeker, more durable, and easier to clean. Some reviewers who own the 6000 unit have commented that they have noticed cracks in the plastic housing in areas where their cookware overhangs the edge of the cooktop. The stainless steel housing obviously avoids this issue.
On the other hand, if you are merely looking to spend as little as possible for a decent quality cooktop, the 6000 unit is certainly fine. It features all the same functionality as the 6200, and will still be quite durable and easy to clean.


When I made my purchase, I was lucky enough to come across an auction on eBay, selling the 6200 unit for only $72. If you happen to find anything of this sort, you should of course go for the 6200 unit, since it's definitely worth the small difference in cost. (See Update Below)


Where to Buy
In general, the cheapest prices for this unit can be found on amazon.com. Links to the two units can be found below (if you click these links I will get a small percentage of the purchase, though you won't pay any more than normal):

Occasionally, there will be sellers on eBay offering these units for cheaper than the normal price, so it is worth doing a search there to see if you can find anything. I will caution you to use your intuition about any really good deals you find, as these are still sensitive electronics, like computers, and may have issues that are not immediately apparent. Do not purchase any unit that isn't offered with a full factory warranty, and if possible, obtain in writing a guarantee from the seller that the unit is in full working condition. This can be helpful if you have to later file a claim to return the unit. These cautions aside, you may occasionally come across a really good deal, so it is definitely worth a look.


Update: I do not recommend purchasing your unit from eBay at all anymore. I just received the unit I purchased from an eBay seller, and the unit was defective. The cooling fan did not turn on, which is not normal, and would cause the unit to give me an internal overheat error. In addition, after speaking with Athena's (the manufacturer) technical support, I discovered that their warranty only supports units bought from official vendors and resellers. Most sellers on eBay are not official resellers, and therefore your warranty will be void. Only buy your unit from official vendors such as amazon.com, or other official resellers (the seller should tell you if they are).


From what I've found, the cheapest official seller anywhere is amazon.com. In addition, they have excellent customer service (something a lot of eBay sellers don't have), free shipping, fast service, and overall a much better purchasing experience. I've ordered my replacement unit from Amazon, and intend to use them for all my future purchases as well.
--------------------

Let me make clear that I am not being paid to advertise this particular unit. This is all based on my own personal research, and my opinion based on that as to what is the best induction unit for someone who is new to the technology. I do make a small percentage if you purchase a unit on Amazon after clicking one of the affiliate links on this page, but I would be recommending this unit either way.

Finally, let me add that I have not yet tried out this unit myself, and therefore can make no comments on it's actual quality or functionality. Everything I've said above is based on reviews and comparisons found online. The unit I have ordered for myself is in the mail now, and as soon as I receive it, I will be writing an actual review of the product. Any observations I make at that point will be added to this post.


Sources:
product reviews on amazon.com
product reviews on walmart.com


I love hearing from you. If this was helpful to you in any way, please leave a quick comment letting me know!